Jenkins 部署服务示例
新建 Job,名称为
tms-backend-dev,类型为流水线,点击保存点击
General页面,选择参数化构建过程添加参数
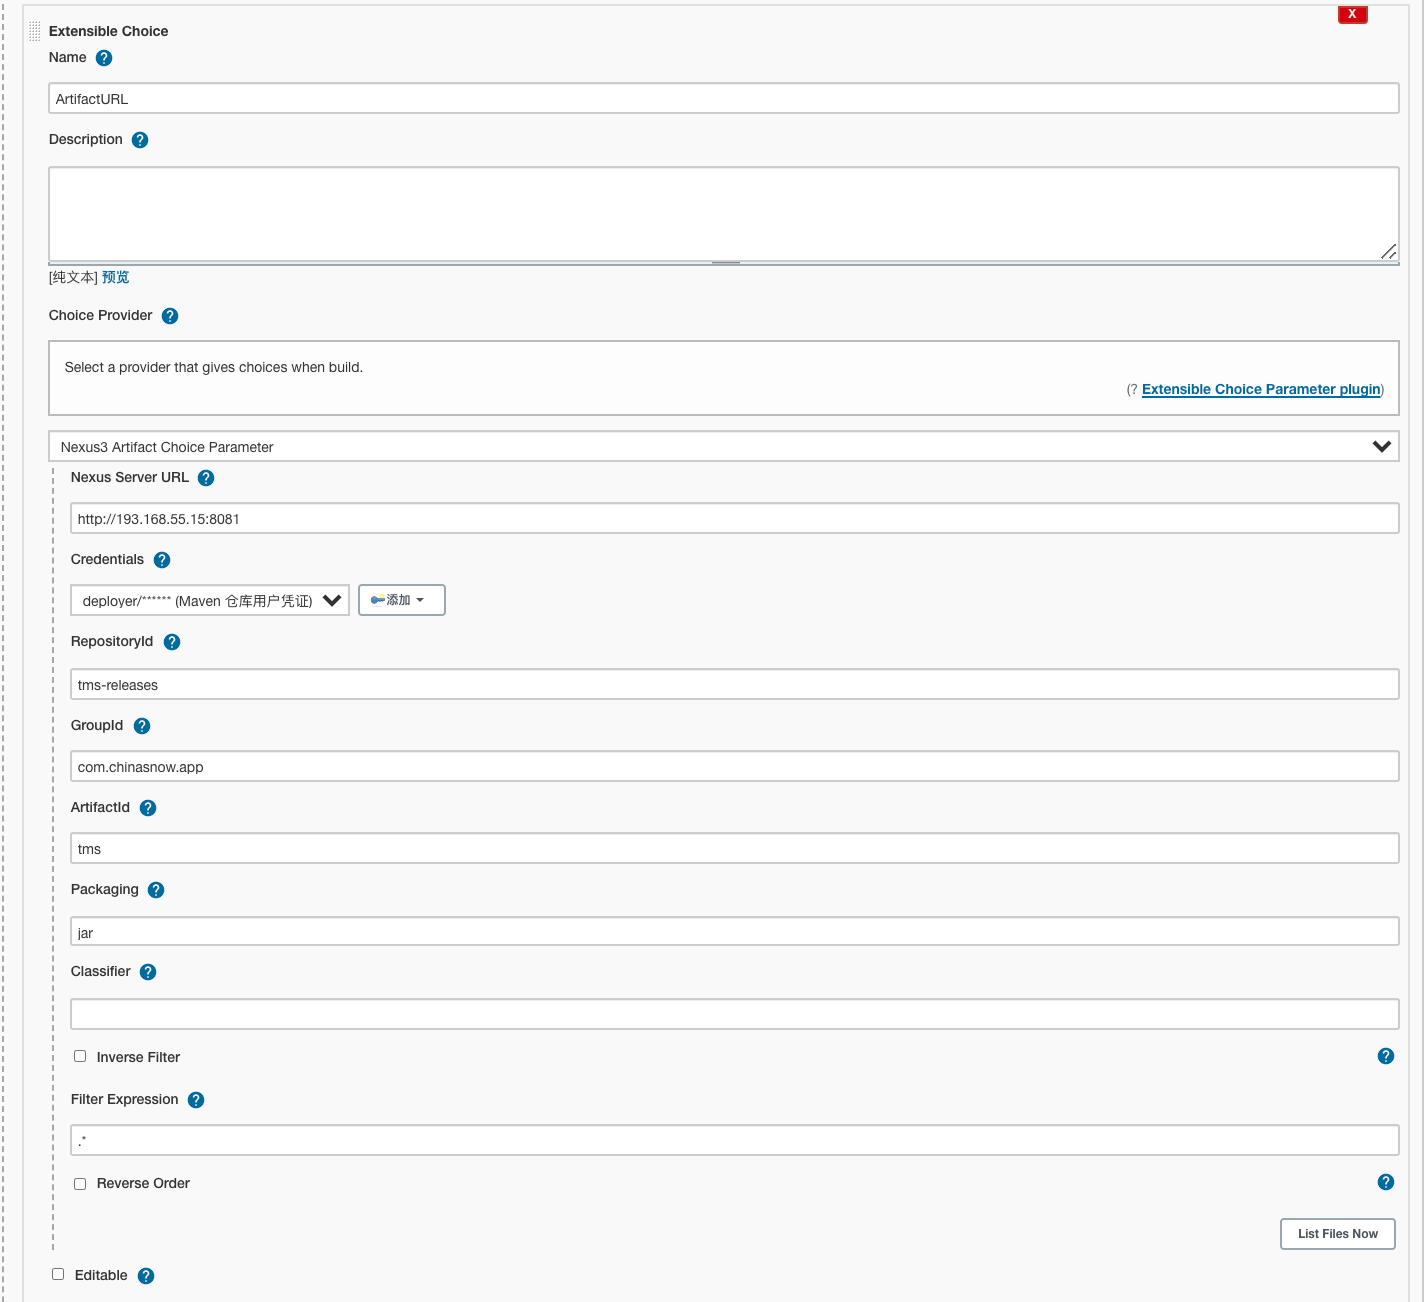
Extensibe Choice,配置如下:
参数描述:
- Name: 参数名称,也就是变量名称
- Description: 描述
- Choice Provider: 选择类型,这里选
Nexus3 Artifact Choice Parameter - Nexus Server URL: 输入 Nexus 服务地址
- Credentials: 选择登录 Nexus 的凭证
- RepositoryId: 项目 Jar 包的仓库地址
- GroupId: 项目 Jar 包的 groupid
- ArtifactId: 项目名
- Packaging: 包的类型
添加隐藏参数

添加文本参数

填写流水线内容,如下
1
2
3
4
5
6
7
8
9
10
11
12
13
14
15
16
17
18
19
20
21
22
23
24
25
26
27
28
29
30
31
32
33
34
35
36
37
38
39
40
41
42
43
44
45
46
47
48
49
50
51
52
53
54
55
56
57
58
59
60
61
62
63
64
65
66
67
68
69
70
71
72
73
74
75
76
77
78
79
80
81
82
83
84
85
86
87
88
89
90
91
92
93
94
95
96
97
98
99
100
101
102
103
104
105
106
107
108
109
110
111
pipeline {
agent any
environment {
FILENAME = sh(returnStdout: true,script: "echo ${env.ArtifactURL} | awk -F '[/]+' '{print \$NF}'").trim()
MAVEN_CREDS = credentials('nexus_user')
}
stages {
stage('Confirm Deploy') {
input {
message "这会发布到生产环境,是否继续 ?"
ok "继续"
}
steps {
wrap([$class: 'BuildUser']) {
script{
build_user = "${BUILD_USER}" // 这里赋值给全局变量 后续的stage中也可以使用到。
}
}
}
}
stage('Download Jar File') {
steps {
sh """
echo "正在从 maven 仓库下载 jar 包..."
wget -c -t3 --http-user="${MAVEN_CREDS_USR}" --http-passwd="${MAVEN_CREDS_PSW}" ${env.ArtifactURL}
"""
}
}
stage('Update Jar File.') {
steps {
echo "Copy Jarfile To TMS Server"
dir("${WORKSPACE}"){
sshagent(credentials: ['deploy_credentials']) {
echo "Delete old Jar file"
sh "ssh -o StrictHostKeyChecking=no -l deployer 193.168.55.39 rm -rf /usr/local/apps/${env.PROJECT}/${env.PROJECT}-*.jar"
echo "Copy new version file to TMS Prod server."
sh "scp ${env.FILENAME} deployer@193.168.55.39:/usr/local/apps/${env.PROJECT}/"
}
}
}
}
stage('Restart TMS Backend Service') {
options {
timeout(time: 2, unit: 'MINUTES')
}
steps {
sshagent(credentials: ['deploy_credentials']) {
echo "Restart TMS Backend service.."
sh """
ssh -o StrictHostKeyChecking=no -l deployer 193.168.55.39 sudo systemctl restart ${env.PROJECT}
"""
}
}
post {
always {
sshagent(credentials: ['deploy_credentials']) {
sh """
ssh -o StrictHostKeyChecking=no -l deployer 193.168.55.39 tailf /var/log/${env.PROJECT}/${env.PROJECT}.log |sed '/Started MainApp in/q'
"""
}
}
success {
emailext body:
"""
<table border="1">
<tr>
<th width="100" bgcolor="green">Job 名称</th>
<td align="center" bgcolor="yellow">${env.JOB_NAME}:${env.BUILD_NUMBER}</td>
</tr>
<tr>
<th width="100" bgcolor="green">项目名称</th>
<td align="center" bgcolor="yellow">${env.PROJECT}</td>
</tr>
<tr>
<th width="100" bgcolor="green">项目版本</th>
<td align="center" bgcolor="yellow">${env.FILENAME}</td>
</tr>
<tr>
<th width="100" bgcolor="green">发版用户</th>
<td align="center" bgcolor="yellow">${build_user}</td>
</tr>
<tr>
<th width="100" bgcolor="green">发版说明</th>
<td align="left" bgcolor="yellow">${env.RELEASE_NOTE}</td>
</tr>
</table>
查看详细日志: <a href="${env.BUILD_URL}"> ${env.JOB_NAME}:${env.BUILD_NUMBER}/console </a>
<p><i>(构建构建日志请查看附件.)</i></p>
""",
compressLog: true,
attachLog: true,
subject: "Job ${env.JOB_NAME}:${env.BUILD_NUMBER} - 状态: ${currentBuild.result?:'SUCCESS'}",
to: '2350686113@qq.com'
}
}
}
stage('Clean Workspace') {
steps {
dir("$WORKSPACE") {
sh "rm -rf ./*"
}
}
}
}
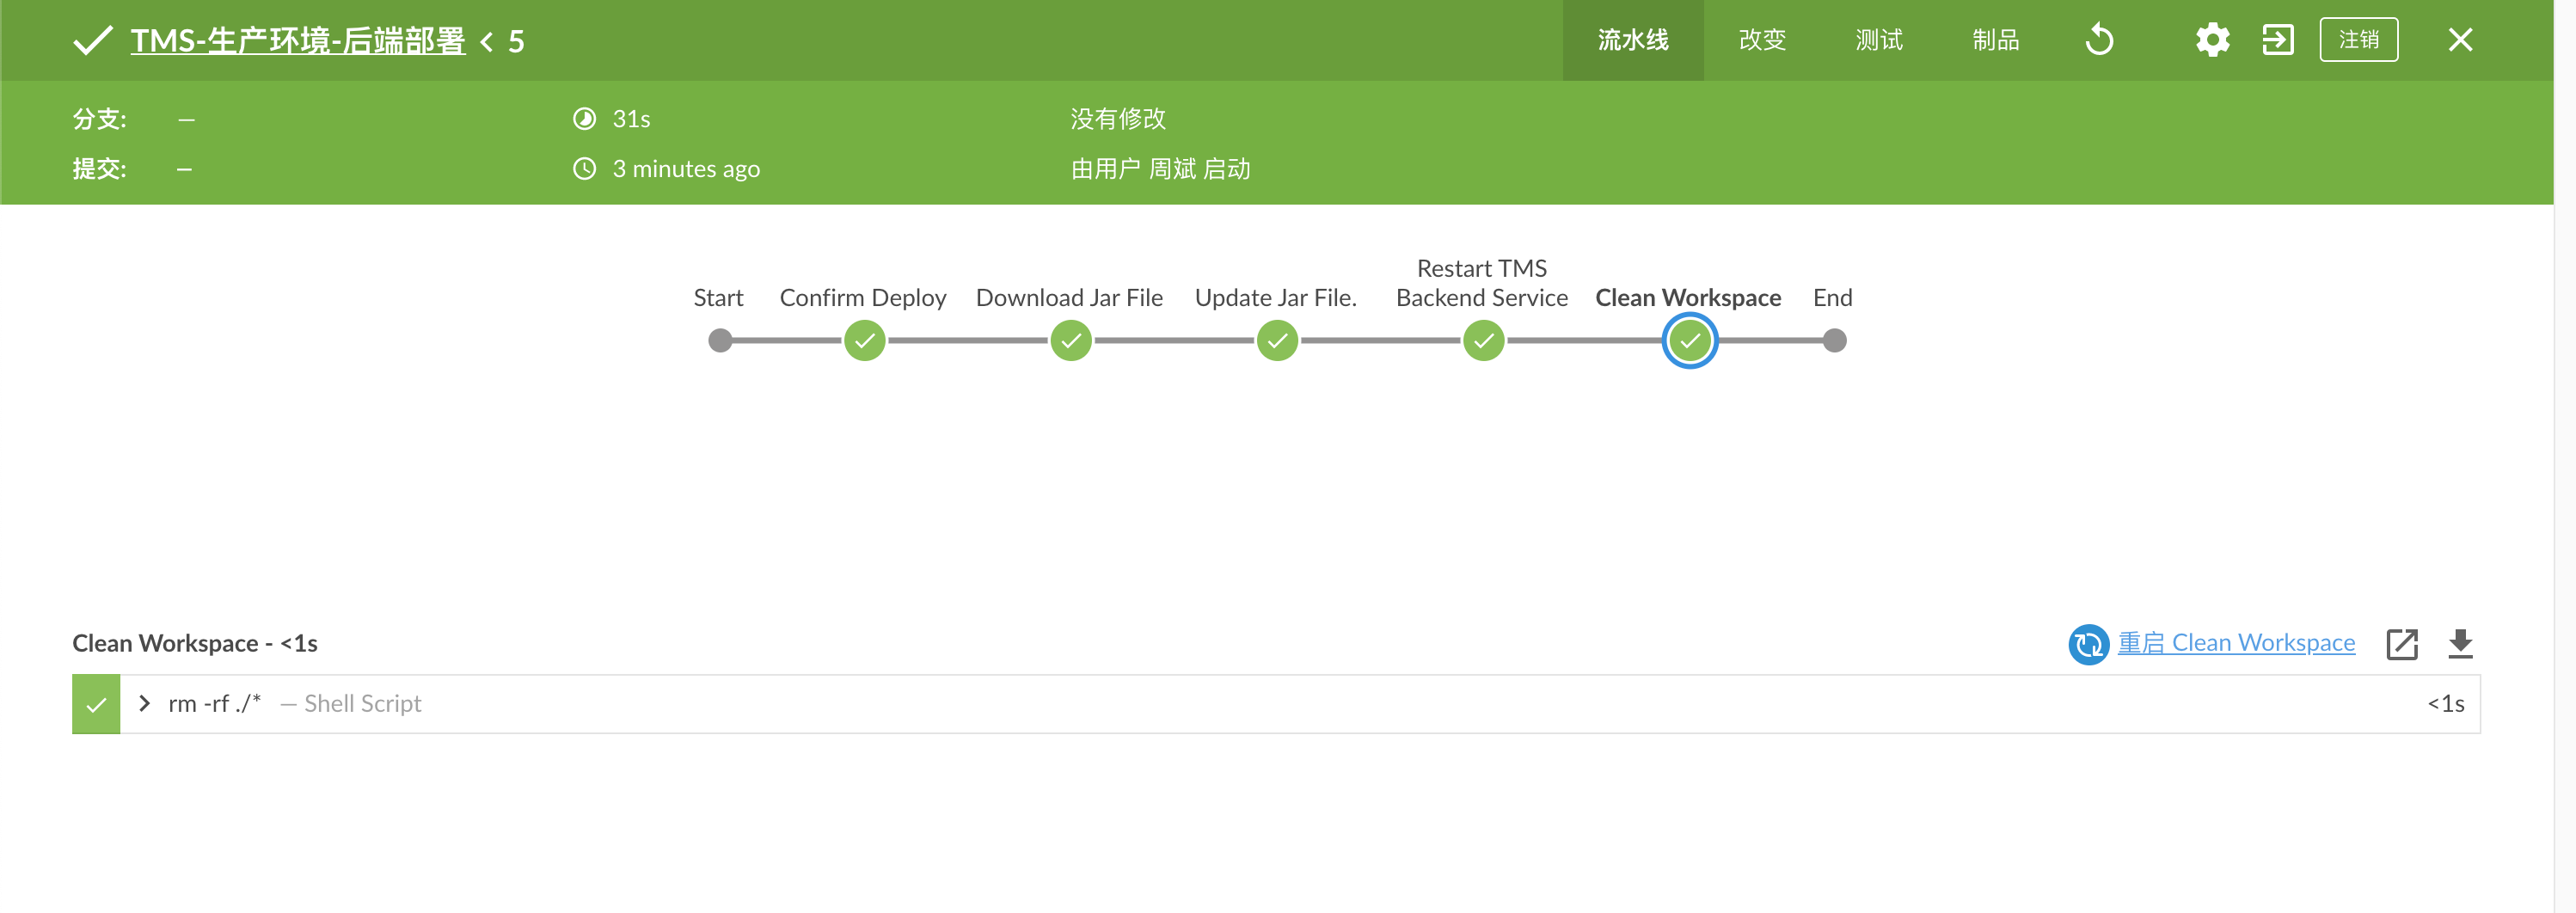
}发版效果如下:

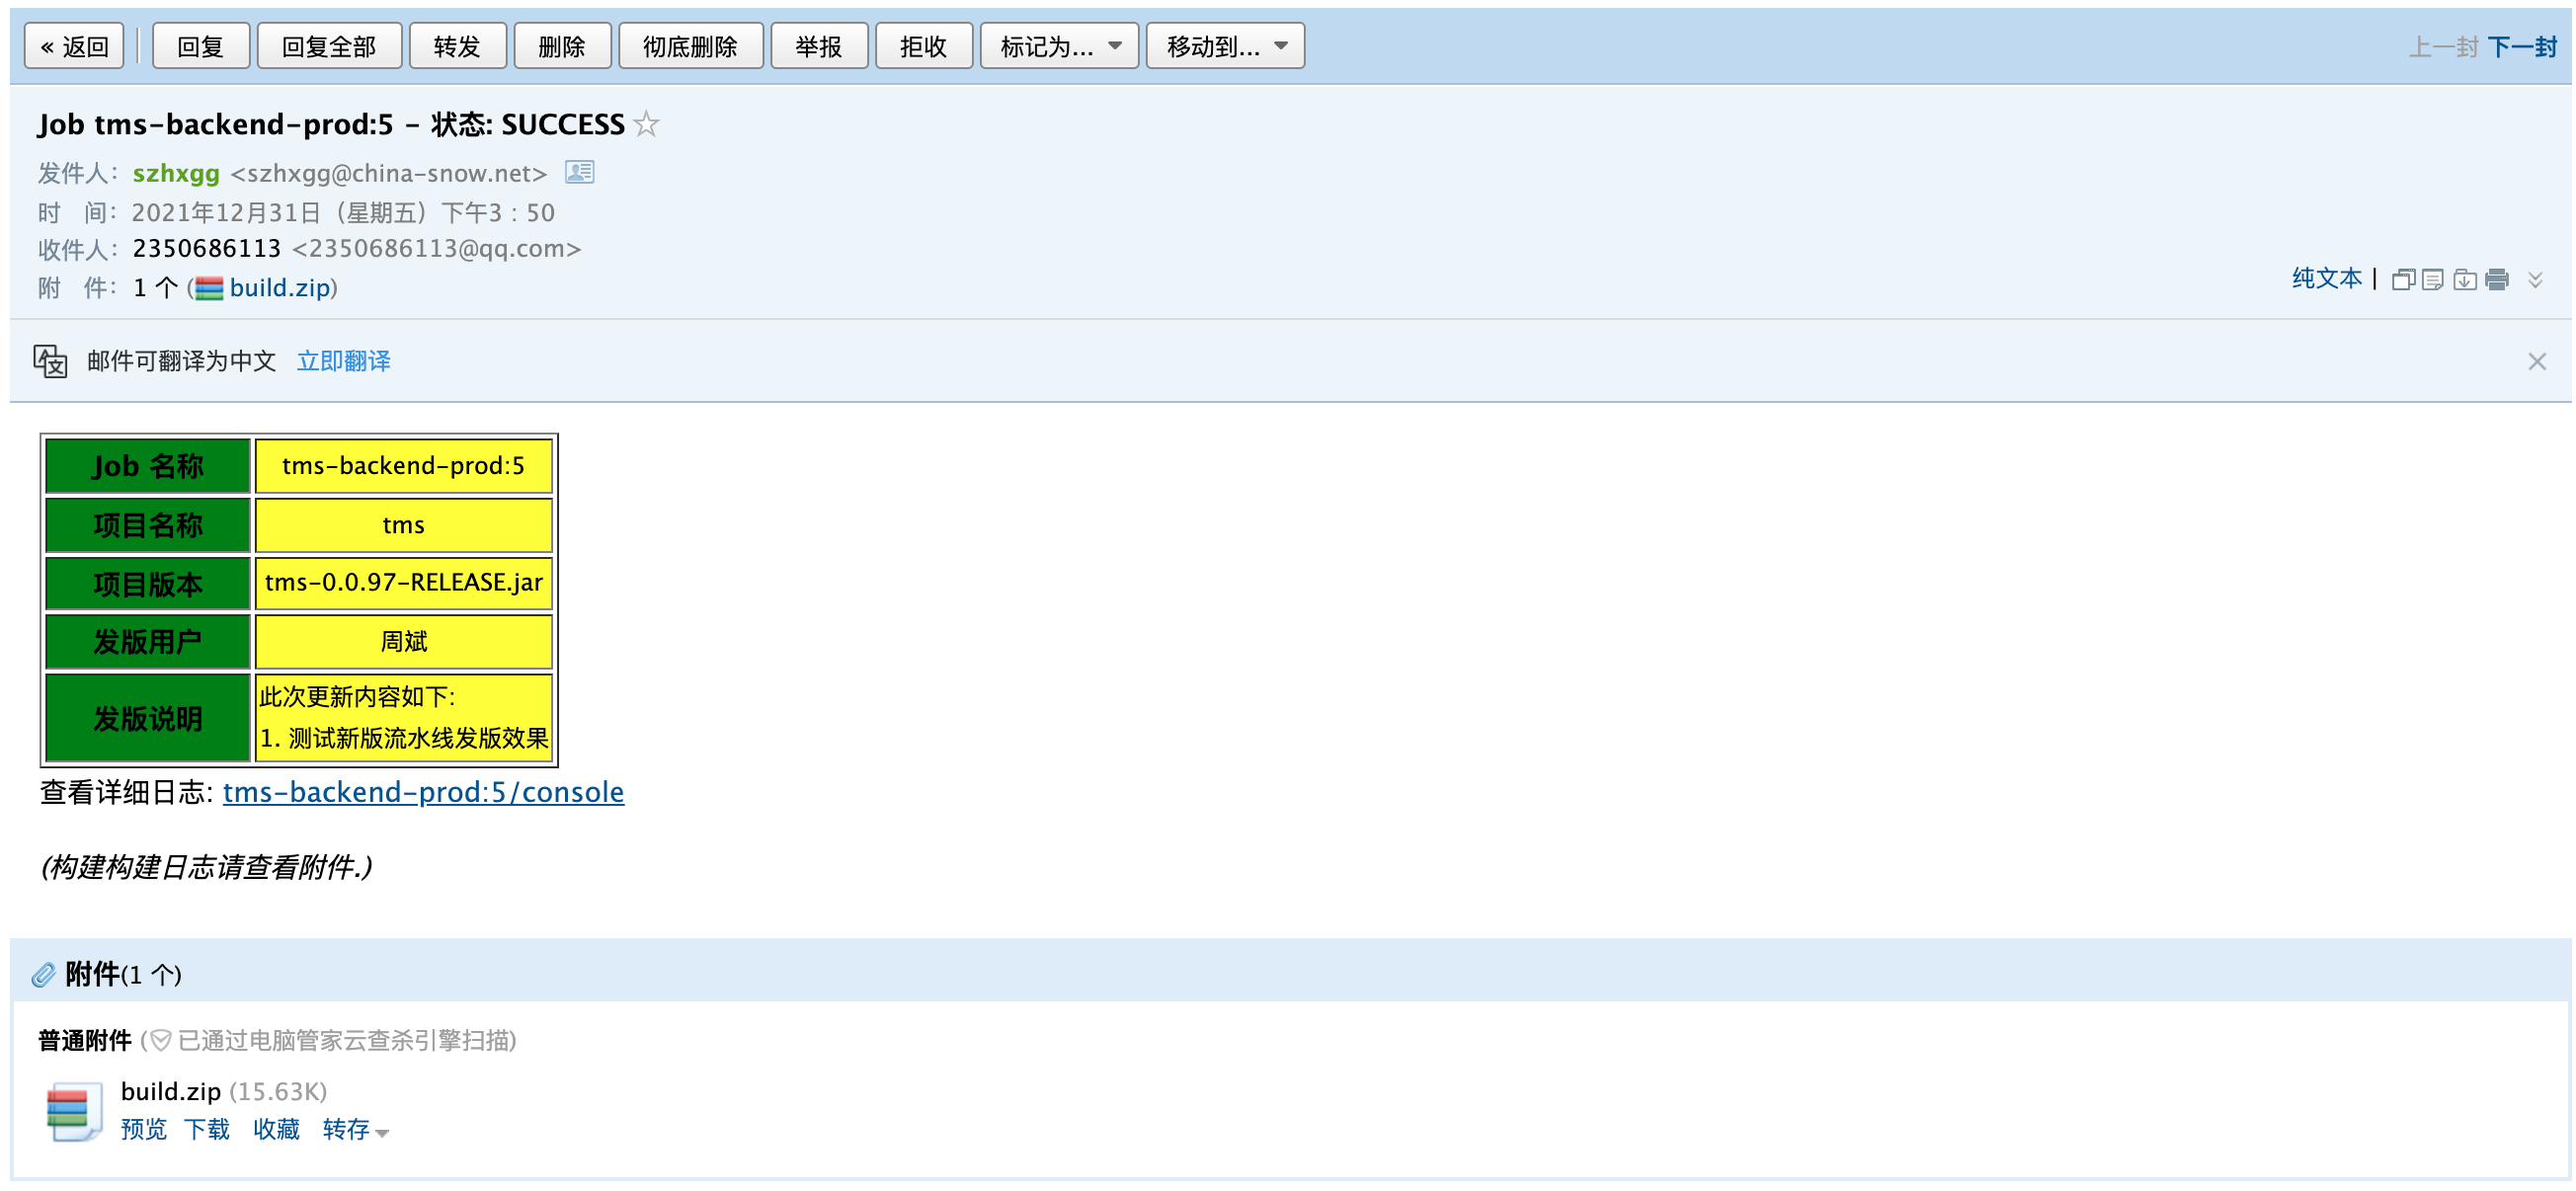
邮件效果:

