架构
数据库是一主两从的架构
| 主机名 | IP 地址 | 系统版本 | MySQL 版本 | 角色 | Server ID |
|---|---|---|---|---|---|
| mysql-master | 192.168.0.71 | CentOS 8.2 | MySQL 8.0.23 | Master | 1 |
| mysql-slave01 | 192.168.0.72 | CentOS 8.2 | MySQL 8.0.23 | Slave | 2 |
| mysql-slave02 | 192.168.0.73 | CentOS 8.2 | MySQL 8.0.23 | Slave | 3 |
MySQL 8.0 安装
检查系统自带的 mariadb 并卸载
1
rpm -qa |grep mariadb
从 MySQL 官网下载指定版本的 MySQL 安装包,这里下载的是
mysql-8.0.23-1.el8.x86_64.rpm-bundle.tar.- MySQL 历史版本下载地址: MySQL Product Archives
解压安装包
1
tar xf mysql-8.0.23-1.el8.x86_64.rpm-bundle.tar
安装 MySQL,应当按照 common–>libs–>client–>server 的顺序安装,否则安装过程会提醒依赖顺序,其他的为非必须安装包。
1
2
3
4
5
6
rpm -ivh mysql-community-common-8.0.23-1.el8.x86_64.rpm
rpm -ivh mysql-community-libs-8.0.23-1.el8.x86_64.rpm \
mysql-community-client-plugins-8.0.23-1.el8.x86_64.rpm \
mysql-community-client-8.0.23-1.el8.x86_64.rpm \
mysql-community-server-8.0.23-1.el8.x86_64.rpm安装完后若提示如下信息
1
2
3
[/usr/lib/tmpfiles.d/mysql.conf:23] Line references path below legacy directory /var/run/, updating /var/run/mysqld → /run/mysqld; please update the tmpfiles.d/ drop-in file accordingly.
[/usr/lib/tmpfiles.d/pesign.conf:1] Line references path below legacy directory /var/run/, updating /var/run/pesign → /run/pesign; please update the tmpfiles.d/ drop-in file accordingly.
[/usr/lib/tmpfiles.d/subscription-manager.conf:1] Line references path below legacy directory /var/run/, updating /var/run/rhsm → /run/rhsm; please update the tmpfiles.d/ drop-in file accordingly.根据提示,修改对应的文件,将
/var/run/xxx–> 修改成/run/xxx创建 MySQL 配置文件 my.cnf,内容如下,修改之前先备份默认的配置文件
cp /etc/my.cnf /etc/my.cnf.bak1
2
3
4
5
6
7
8
9
10
11
12
13
14
15
16
17
18
19
20
21
22
23
24
25
26
27
28
29
30
31
32
33
34
35
36
37
38
39
40
41
42
43
44
45
46
47
48
49
50
51
52
53
54
55
56
57
58
59
60
61
62
63
64
65
66
67
68
69
70
71
72
73
74
75
76
77
78
79
80
81
82
83
84
85
86
87
88
89
90
91
92
93
94
95
96
97
98[client]
port = 3306
socket = /var/lib/mysql/mysql.sock
default-character-set = utf8mb4
[mysql]
prompt="MySQL [\\d]> "
no-auto-rehash
[mysqld]
port = 3306
socket = /var/lib/mysql/mysql.sock
default_authentication_plugin = mysql_native_password
# 设置数据库不区分大小写
lower_case_table_names = 1
datadir = /data/mysql
pid-file = /data/mysql/mysql.pid
user = mysql
bind-address = 0.0.0.0
server-id = 1
init-connect = 'SET NAMES utf8mb4'
character-set-server = utf8mb4
collation-server = utf8mb4_0900_ai_ci
skip-name-resolve
#skip-networking
back_log = 300
max_connections = 1000
max_connect_errors = 6000
open_files_limit = 65535
table_open_cache = 128
max_allowed_packet = 500M
binlog_cache_size = 1M
max_heap_table_size = 8M
tmp_table_size = 16M
read_buffer_size = 2M
read_rnd_buffer_size = 8M
sort_buffer_size = 8M
join_buffer_size = 8M
key_buffer_size = 4M
thread_cache_size = 8
ft_min_word_len = 4
log_bin = mysql-bin
binlog_format = mixed
binlog_expire_logs_seconds = 604800
log_error = /data/mysql/mysql-error.log
slow_query_log = 1
long_query_time = 1
slow_query_log_file = /data/mysql/mysql-slow.log
performance_schema = 0
explicit_defaults_for_timestamp
#lower_case_table_names = 1
skip-external-locking
default_storage_engine = InnoDB
#default-storage-engine = MyISAM
innodb_file_per_table = 1
innodb_open_files = 500
innodb_buffer_pool_size = 64M
innodb_write_io_threads = 4
innodb_read_io_threads = 4
innodb_thread_concurrency = 0
innodb_purge_threads = 1
innodb_flush_log_at_trx_commit = 2
innodb_log_buffer_size = 2M
innodb_log_file_size = 32M
innodb_log_files_in_group = 3
innodb_max_dirty_pages_pct = 90
innodb_lock_wait_timeout = 120
bulk_insert_buffer_size = 8M
myisam_sort_buffer_size = 8M
myisam_max_sort_file_size = 10G
myisam_repair_threads = 1
interactive_timeout = 28800
wait_timeout = 28800
[mysqldump]
quick
max_allowed_packet = 500M
[myisamchk]
key_buffer_size = 8M
sort_buffer_size = 8M
read_buffer = 4M
write_buffer = 4M创建数据库数据存放目录 /data/mysql
1
mkdir /data/mysql -p
初始化数据库,注意,由于这里配置文件中加入了不区分大小写的配置,所以 MySQL 初始化时需要添加
--lower_case_table_names=1参数;1
mysqld --user=mysql --lower_case_table_names=1 --initialize-insecure --basedir=/var/lib/mysql --datadir=/data/mysql
启动 MySQL,并配置开机启动
1
systemctl enable --now mysqld
执行以下命令,对数据库进行安全性设置
1
2
3
4
5
6
7
8
9
10
11
12
13
14
15
16
17
18
19
20
21
22
23
24
25
26
27
28
29
30
31
32
33
34
35
36
37
38
39
40
41
42
43
44
45
46
47
48
49
50
51
52
53
54
55
56
57
58
59
60
61
62
63
64
65
66
67
# mysql_secure_installation
mysql_secure_installation: [ERROR] unknown variable 'default-character-set=utf8mb4'.
Securing the MySQL server deployment.
Connecting to MySQL using a blank password.
VALIDATE PASSWORD COMPONENT can be used to test passwords
and improve security. It checks the strength of password
and allows the users to set only those passwords which are
secure enough. Would you like to setup VALIDATE PASSWORD component?
Press y|Y for Yes, any other key for No: y
There are three levels of password validation policy:
LOW Length >= 8
MEDIUM Length >= 8, numeric, mixed case, and special characters
STRONG Length >= 8, numeric, mixed case, special characters and dictionary file
Please enter 0 = LOW, 1 = MEDIUM and 2 = STRONG: 1
Please set the password for root here.
New password:
Re-enter new password:
Estimated strength of the password: 100
Do you wish to continue with the password provided?(Press y|Y for Yes, any other key for No) : y
By default, a MySQL installation has an anonymous user,
allowing anyone to log into MySQL without having to have
a user account created for them. This is intended only for
testing, and to make the installation go a bit smoother.
You should remove them before moving into a production
environment.
Remove anonymous users? (Press y|Y for Yes, any other key for No) : y
Success.
Normally, root should only be allowed to connect from
'localhost'. This ensures that someone cannot guess at
the root password from the network.
Disallow root login remotely? (Press y|Y for Yes, any other key for No) : n
... skipping.
By default, MySQL comes with a database named 'test' that
anyone can access. This is also intended only for testing,
and should be removed before moving into a production
environment.
Remove test database and access to it? (Press y|Y for Yes, any other key for No) : y
- Dropping test database...
Success.
- Removing privileges on test database...
Success.
Reloading the privilege tables will ensure that all changes
made so far will take effect immediately.
Reload privilege tables now? (Press y|Y for Yes, any other key for No) : y
Success.
All done!
配置主从同步
主节点创建主从同步账户
1
2
3
4
5
6
7
MySQL [(none)]> create user 'replicate_user'@'%' identified BY '*********'; -- 实际密码替换 *
MySQL [(none)]> alter user 'replicate_user'@'%' identified with mysql_native_password by '*********'; -- 修改密码
MySQL [(none)]> grant replication slave on *.* to 'replicate_user'@'%'; -- 用户授权
MySQL [(none)]> flush privileges; -- 刷新权限表配置二进制日志 binlog 以及添加 server-id
- 主从所有节点,停止 MySQL 服务
1
systemctl stop mysqld
- mysql-master 节点 /etc/my.cnf 配置内容
1
2
server-id=1
binlog-do-db = metaverse # 只同步 metaverse 数据库- mysql-slave01 节点 /etc/my.cnf 配置内容
1
2
server-id=2
replicate-do-db = metaverse- mysql-slave02 节点 /etc/my.cnf 配置内容
1
2
server-id=3
replicate-do-db = metaverse参数说明:
master 端
- binlog-do-db 二进制日志记录的数据库(多数据库用逗号,隔开)
- binlog-ignore-db 二进制日志中忽略数据库 (多数据库用逗号,隔开)
slave端
- replicate-do-db 设定需要复制的数据库(多数据库使用逗号,隔开)
- replicate-ignore-db 设定需要忽略的复制数据库 (多数据库使用逗号,隔开)
- replicate-do-table 设定需要复制的表
- replicate-ignore-table 设定需要忽略的复制表
- replicate-wild-do-table 同replication-do-table功能一样,但是可以通配符
- replicate-wild-ignore-table 同replication-ignore-table功能一样,但是可以加通配符
重启 MySQL 服务
1
systemctl restart mysqld
登录 mysql-master 节点,执行以下命令,重置主节点 MySQL 偏移量
1
2
MySQL [(none)]> reset master; -- 重置偏移量,如果不重置,从节点也会创建replicate_user同步用户
MySQL [(none)]> show master status; -- 查看master信息获取信息如下,从节点配置会用到:
- bin-log 文件:mysql-bin.000001
- Position: 156
注册从节点
登陆从节点数据库,执行以下命令配置主从同步
1
2
3
MySQL [(none)]> stop slave;
MySQL [(none)]> reset slave;
MySQL [(none)]> change master to master_host='192.168.0.71',master_user='replicate_user',master_port=3306,master_password='********',master_log_file='mysql-bin.000001',master_log_pos=156;参数解释:
- master_host : 主节点IP
- master_user : 主从同步账户
- master_port : 主节点mysql服务的端口号
- master_password : 主从同步账户的密码
- master_log_file : master节点获取的二进制文件名字
- master_log_pos : master节点获取的Position值
启动从节点slave
1
MySQL [(none)]> start slave;
查看从节点状态
1
MySQL [(none)]> show slave status \G
注意:这两项参数 为 YES 说明搭建成功了:
- Slave_IO_Running: Yes
- Slave_SQL_Running: Yes
修改从节点为只读,默认数据库实例是可读写,为保持数据一致性,建议从库配置为只读。
1
2
3
4
5
6
7
8
-- 设置普通用户只读,超级用户可读写
MySQL [(none)]> set global read_only=1;
-- 或者设置 超级用户只读
MySQL [(none)]> set global super_read_only=1; -- super_read_only=1,
-- 查询只读状态
MySQL [(none)]> show global variables like '%read_only%';
主从同步测试
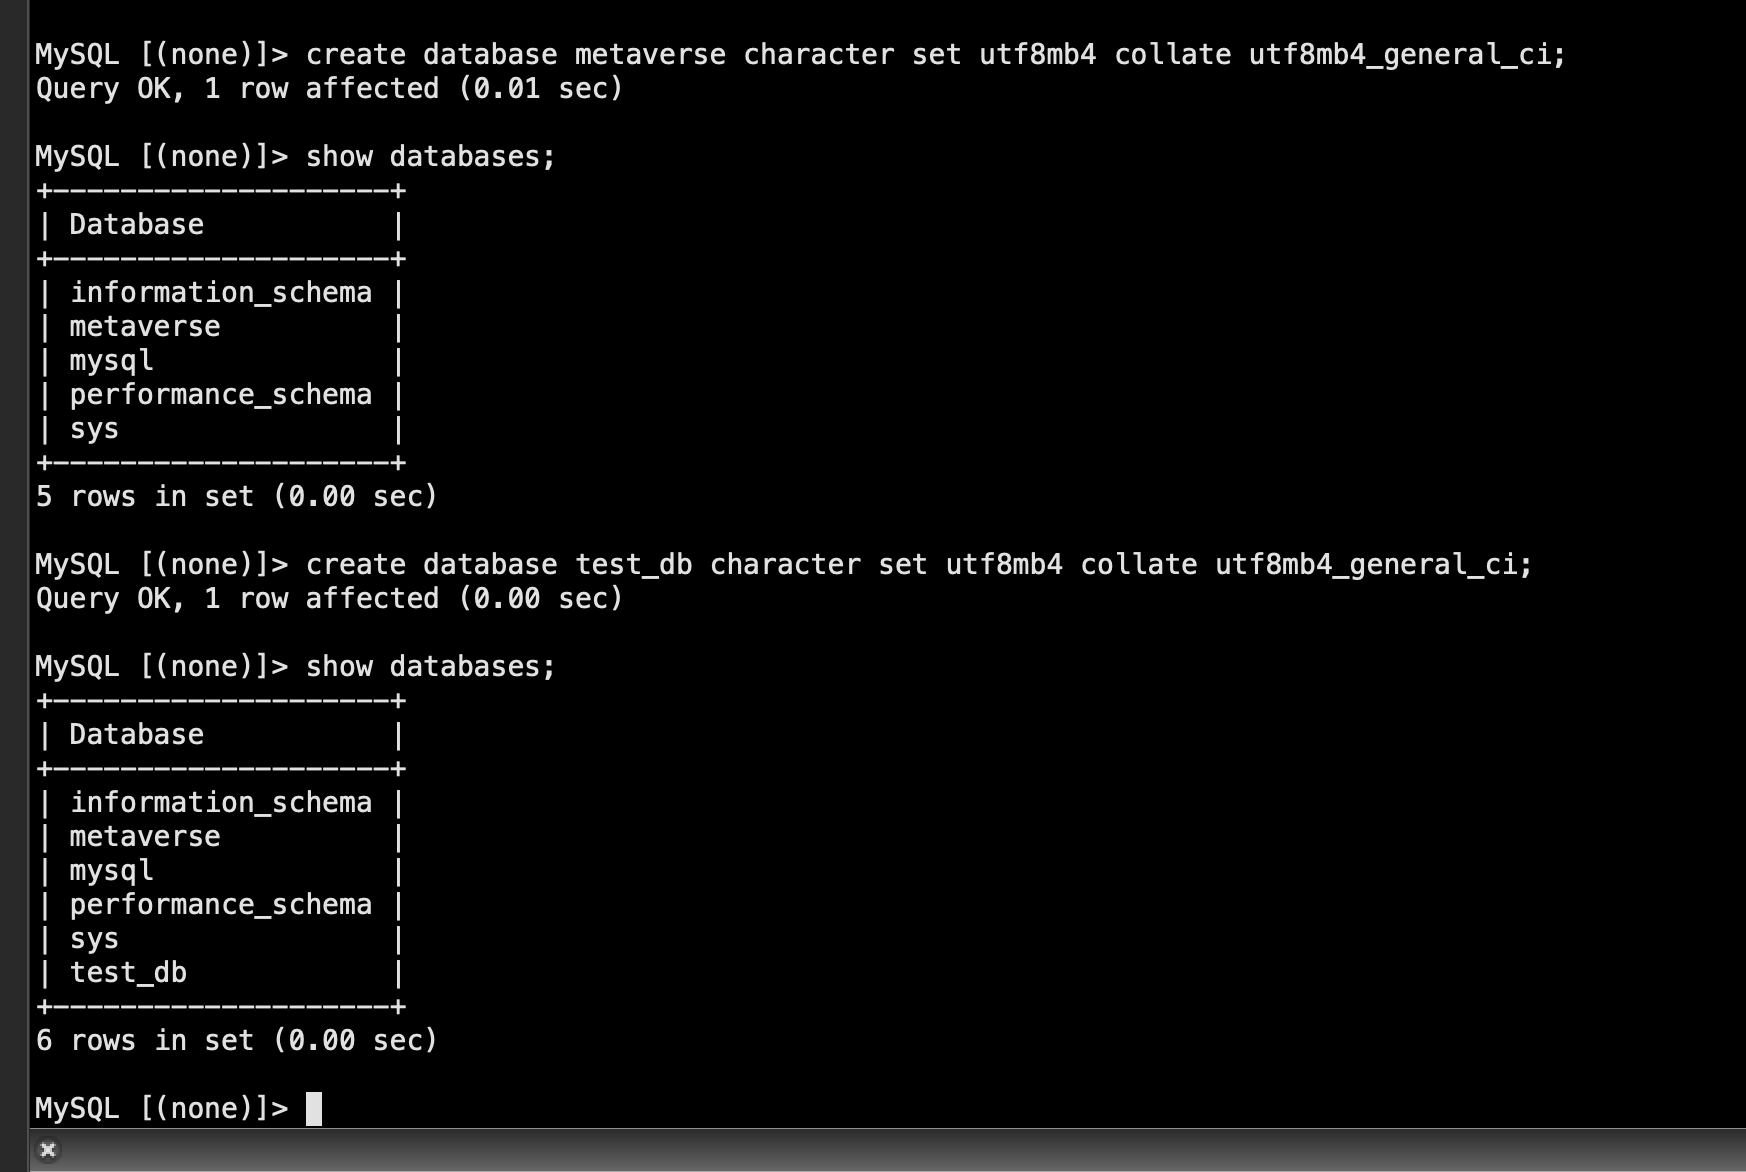
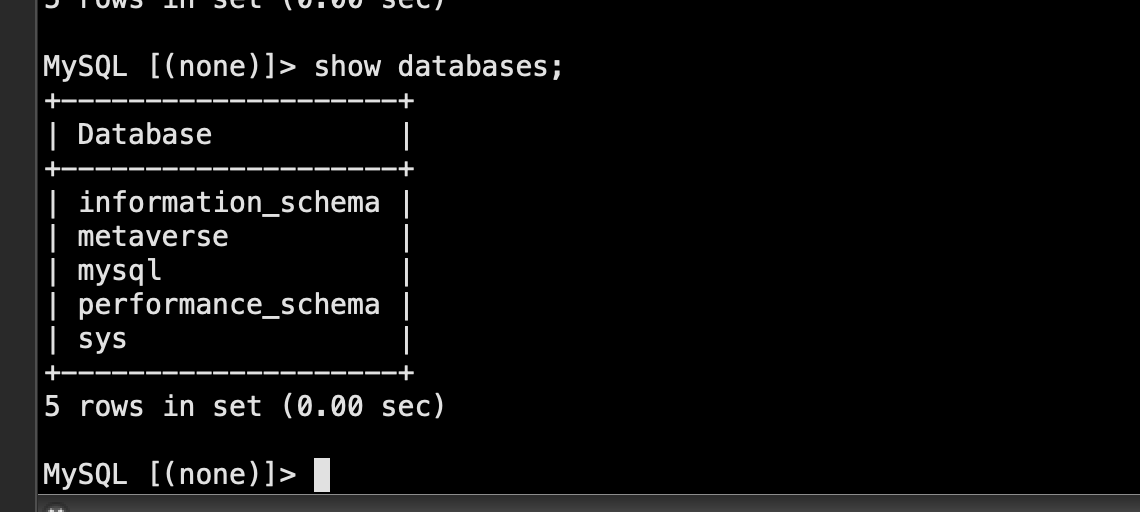
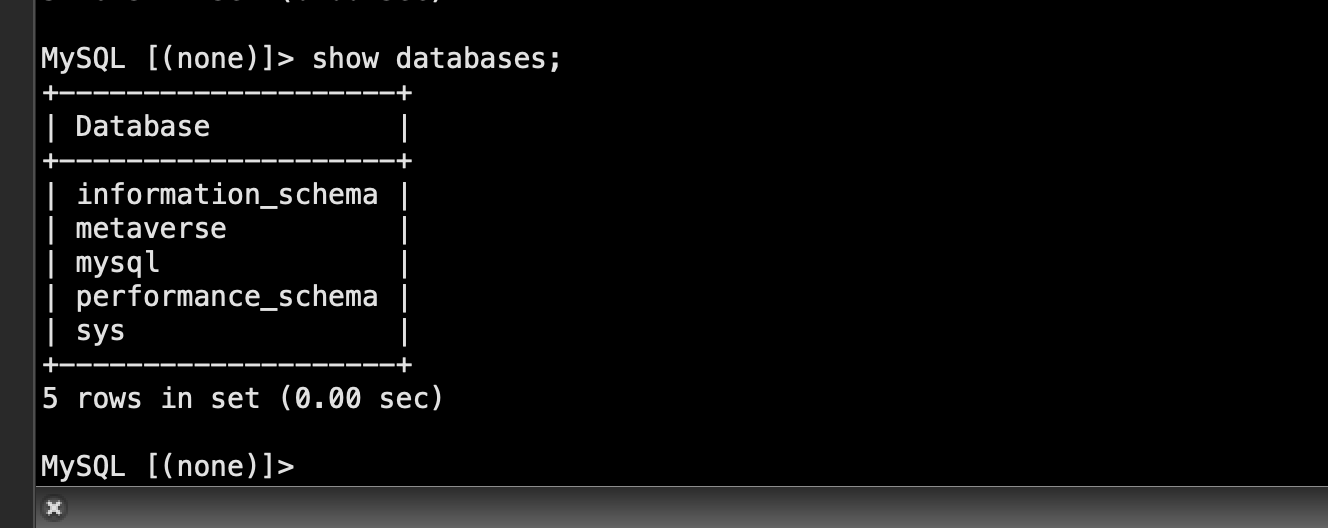
主节点创建 metaverse 库,从节点查看是否同步
1
MySQL [(none)]> create database metaverse character set utf8mb4 collate utf8mb4_general_ci;
查看同步状态
如上所示,只有 metaverse 数据库被同步过去,说明配置生效
MySQL 8 报错
提示
'mysql.infoschema'@'localhost'用户不存在,如下:1
ERROR 1449 (HY000): The user specified as a definer ('mysql.infoschema'@'localhost') does not exist
解决方法:
1
2
3
MySQL [mysql]> CREATE USER 'mysql.infoschema'@'%' IDENTIFIED BY '**********';
MySQL [mysql]> grant all privileges on *.* to 'mysql.infoschema'@'%';
MySQL [mysql]> flush privileges;
同步部分数据配置
同步部分数据有两个思路:
- master只发送需要的;
- slave只接收想要的。
master 端配置
binlog-do-db 二进制日志记录的数据库(多数据库用逗号,隔开)
binlog-ignore-db 二进制日志中忽略数据库 (多数据库用逗号,隔开)
举例说明:
- binlog-do-db=YYY # 需要同步的数据库,不在内的不同步。(不添加这行表示同步所有)
- binlog-ignore-db = mysql # 这是不记录 binlog,来达到从库不同步mysql库,以确保各自权限
- binlog-ignore-db = performance_schema
- binlog-ignore-db = information_schema
slave 端配置
replicate-do-db 设定需要复制的数据库(多数据库使用逗号,隔开)
replicate-ignore-db 设定需要忽略的复制数据库 (多数据库使用逗号,隔开)
replicate-do-table 设定需要复制的表
replicate-ignore-table 设定需要忽略的复制表
replicate-wild-do-table 同replication-do-table 功能一样,但是可以通配符
replicate-wild-ignore-table 同replication-ignore-table功能一样,但是可以加通配符
举例说明:
- replicate-wild-do-table=db_name.% # 只复制哪个库的哪个表
- replicate-wild-ignore-table=mysql.% # 忽略哪个库的哪个表
- replicate-wild-ignore-table = %.%xxl_job_log # 忽略所有库中的 xxl_job_log 表


